


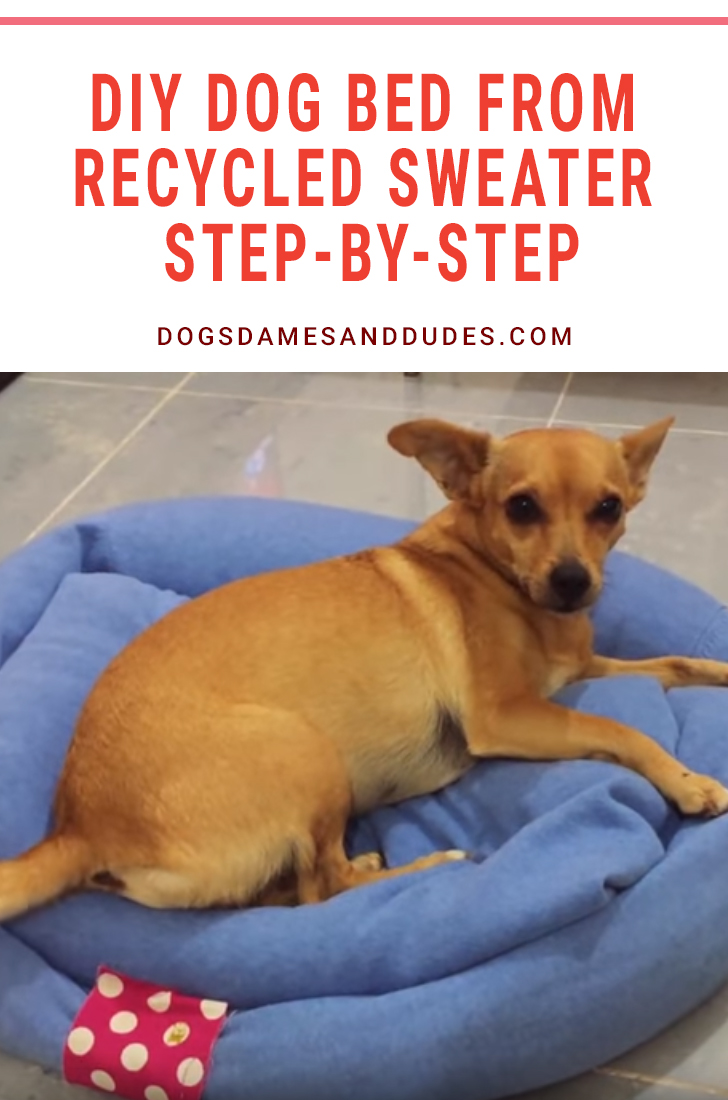
Want to give your pup a nice, comfy and soft place to rest while being good to our planet? By recycling a sweatshirt, jumper or other sweater you can make your own DIY dog bed in just a few, easy steps!
Materials Needed
- 1 – Sweater (Make sure the dog can lay on the sweater comfortably to ensure right size)
- 1 – Sewing Needle
- 1 – Sewing Thread
- 1 – Package of Fibre-Fill Stuffing*
- 1 – Hot Glue Gun & Glue Stick (Not recommended)**
* The video says to use Styrofoam balls, like the ones used in bean bags, but this can be toxic to dogs, as well as very messy if they chew through the sweater. We recommend you use a non-toxic fibre-fill instead.
** The glue from hot glue is also toxic to dogs – when combined with stomach acid it can expand like foam and cause obstructions. Our advice? Sew the ends of the decorative fabric instead of gluing it, just in case.
Instructions

#1. Sew The Neckline Closed

To begin, you want to sew the neck area closed. To do this, thread your needle with a good length of sewing thread and tie a knot in the end. If you'd like a clean edge (like shown in the video) turn in the sweater collar (if there is one) and use the hemming stitch to the end, securing and then cutting your thread.
#2. Sew Straight Across The Chest
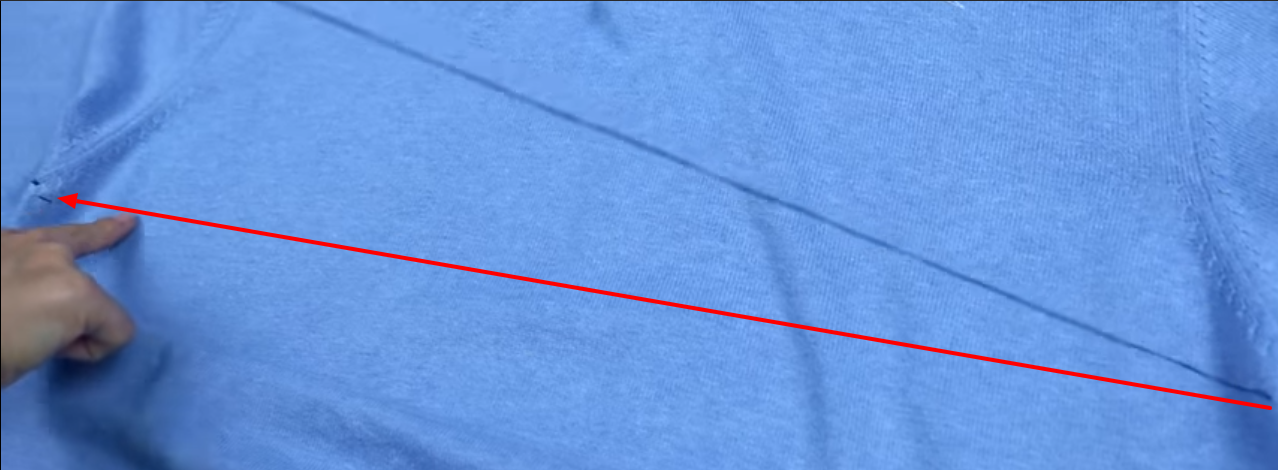
Begin again by threading your needle and knotting the end, then starting from the bottom of one armpit to the other, sew horizontally across the chest using a running stitch. Secure and cut thread.
#3. Fill Top Of Sweater With Fibre-Fill

Place non-toxic fibre-fill through the sleeves, filling the sewn-off chest area. Also fill up half of each sleeve. This will form the surrounding “wall” of the DIY dog bed.
#4. Fill Bottom Of Sweater With Fibre-Fill

Fill the bottom portion of the sweater with non-toxic fibre-fill to desired firmness. To make next step easier, place clothespins along the bottom hem to keep it closed and keep the fibre-fill inside.
#5. Sew Bottom Hem Closed
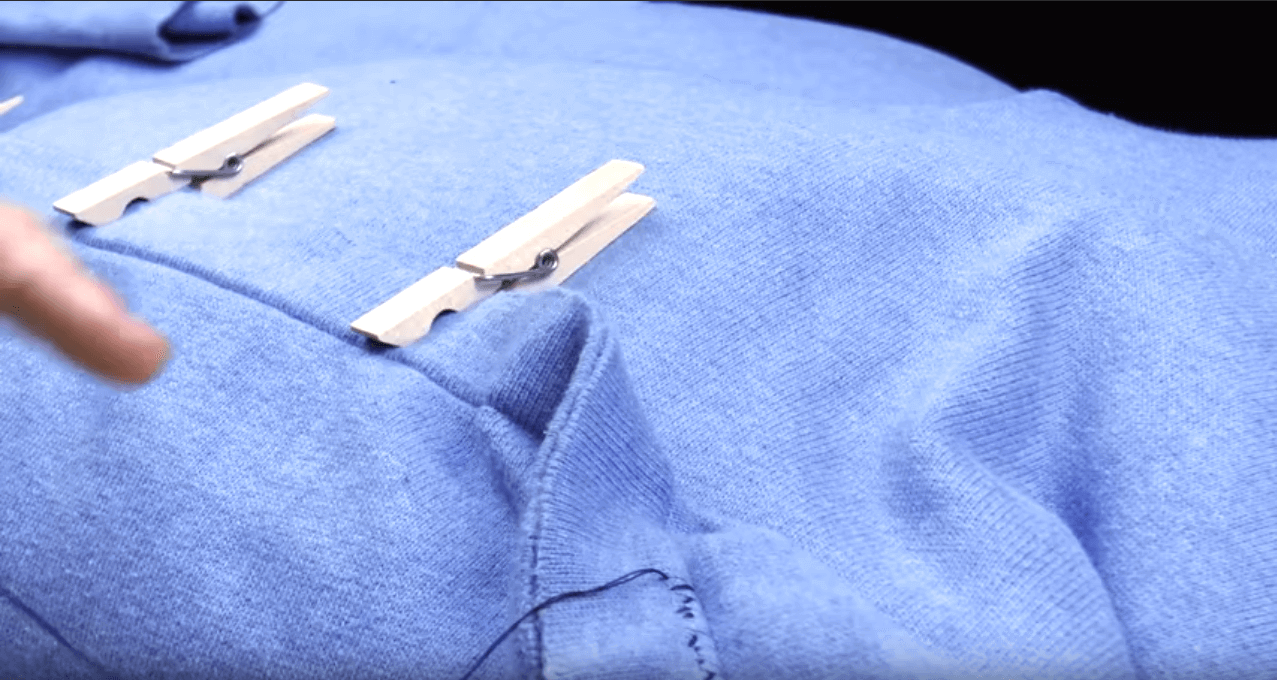
Starting at one side at the top of the sweater's bottom hem, sew across, sealing the fibre-fill in. Remove clothespins as you come to them. Secure and cut thread.
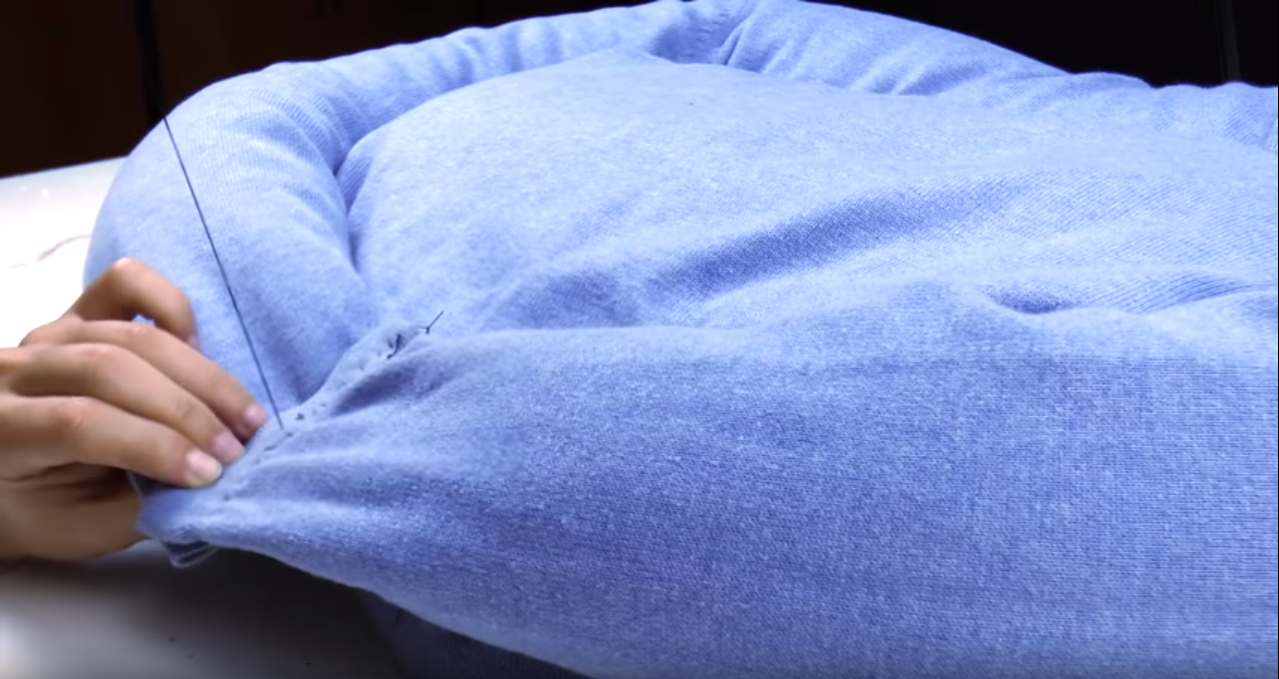
#6. Fill Sleeves And Sew Cuffs Closed

With one sleeve at a time, fill the remainder of the sleeve up to the cuff, then sew the cuff shut at the hem. Repeat this for the other sleeve.
#7. Sew Base Of Sleeves Together
Bring the sleeves around the main bedding area and, overlapping one sleeve cuff over the other, sew the sleeves together. The rim of your DIY dog bed is now formed.
#8. Tack Sleeves To Base On Reverse Side

Flip the homemade dog bed over and tack down the sleeves to the base of the bed in at least the four corners. This is the encourage the sleeves not to move away from the base of the bed.
#9. Cover Sleeve Ends With Decorative Fabric

To give a more pleasing and professional look to your new homemade dog bed, using a piece of complementary decorative fabric, cover the sleeve ends by wrapping them with the fabric. Sew the ends of the decorative fabric together on the inside of the dog bed.
#10. Enjoy!

After you've completed all these steps, you should have a nice new bed for your favorite pooch to use that was truly made with love. Enjoy!
If you'd like to watch the video where we got this great idea, you can do so here:
If you liked this DIY Dog Bed step-by-step tutorial and would like to see more, please share it with your friends and family on social media. This helps us at Dogs, Dames and Dudes to continue bringing you great content such as this!


")

