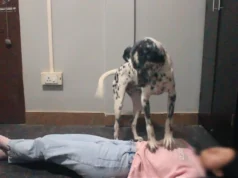
Our guest Matt and his Siberian Husky Ghost are here to show our visitors how he built a doghouse for under $100.

Material List
- Pressure-treated 2×4's (Base only – nothing where the dog might chew on)
- Regular 2×4's (the 4 posts)
- Plywood (the floor and the roof)
- Wooden Siding (the 4 sides of the house)
- Scrap Poplar (to frame the windows/Doors)
- Roof Shingles
- Screws
- Construction adhesive (for trim pieces and the shingles)
This idea came to me because I wanted my dog Ghost to have a place to hide from the sun on a hot day.
To get started, I cut down some pressure-treated two by fours to make a frame for the base of the doghouse. If you're building your own dog house, make sure you only use pressure-treated wood for the base, not inside, of the doghouse. The chemicals in the wood can be dangerous for animals if they decide to chew on it.


I didn't build my workbench yet so I don't have a flat surface to build on. I decided to clamp my pieces to the table saw so I made sure that I had nice 90-degree corners.


Once the frame was assembled, I put a piece of plywood on top and marked off where to trim the piece of wood. Once it was cut to the correct size, I screwed the plywood to the base


The next step was putting together a frame to attach the walls. I wanted the frame to be part of the design, so I screwed two by fours together to attach the walls from the inside, while looking like trim for the corners on the outside. The two front legs are taller than the back two legs to make a slanted roof.


I don't own a countersink bit so I used a drill bit that was larger than the screw heads I was using. I will fill these holes in with wood filler later when putting the legs together.


I purposely did not put screws close to the top. This is because I'm going to cut an angle at the top of the legs so the roof can be attached properly.


At this point, it started to rain. I decided to put most of my tools away and realize there's part of my driveway that was being protected by a tree. I decided to move the project over and use this time to sand and fill the screw holes with wood filler while I waited for the rain shower to pass. Once it stopped raining I could continue to work on the build.


I used a piece of wood siding to make the walls of the house. I had the piece cut in half that way it would fit in my car on the way home from my local store. This actually made it much easier for me to work with as well.

I lined the piece up with the two legs and marked how long the piece needed to be. I didn't have a long enough table to properly balance the piece, so I put a clamp at the end of a 2×4 to stabilize it while I cut the piece with a circular saw. Once that was cut, I repeated the process to mark off how high the piece needed to be.


The front of the doghouse was now done and I marked out the door and cut it with the jigsaw and attached the front of the house from the inside. I repeated this process for the sides and the back of the house.


Now it's time for the roof. I took another piece of plywood and place it on top of the walls and use a tape measure to make sure it was centered. Once it was in a place that I liked, I screwed it in place.


I wanted to use shingles for the roof to add to the aesthetics as well as try and waterproof it a little. I could have used a waterproofing membrane underneath it but I thought that might be a little overkill.

Did you notice my first mistake? I tried nailing the shingles on top before realizing that the nail went straight through the plywood. I removed the nail and decided to go with construction adhesive to make sure that the shingles stayed in place.


Now it's time for some finishing touches. I wanted to add some windows so I marked out where I wanted them and used the drill to put a hole in the side so I can use the jigsaw to cut the windows out


After doing two windows on the sides I decided I want to make one on the front as well.
I cut one-inch strips from some scrap hardwood plywood I had in the garage to make some trim pieces for the windows and doors and attach them using glue and clamps until they dried.


Once the glue dried I used a flush-trim bit on the router to clean up the edges of the windows and door and sanded everything down and that's how I built my dog goes to the dog house for under one-hundred dollars.
You can view the full video below:


